Genoise sponge

For those of you who asked for it… this is the recipe I used for the roulade last week.
The measurements are suited to a 60cm x 40cm tray so do scale down if you have a smaller oven – I used only 1/2 the recipe for mine!

All that you need:
4 medium eggs
125g sugar
75g plain flour

A baking tray
A heatproof bowl (glass or steel are best!)
A hot water bath (Kitchen towels placed in a pan of water, heated at low temperature)

Get started!

Whisk eggs and sugar on a hot water bath till sugar dissolves

Take off heat and continue whisking

... until you can see ribbons when the mix is drizzled and it is cold to touch.

Fold in the flour in 3 or 4 parts

Spread on a tray lined with baking paper or silicon mat

Bake at 180° C for 10-12 minutes till it looks like this…

Golden brown and evenly cooked

Leave to cool on baking sheet (NOT on the tray).

It should be ready to roll in 15 minutes!

TIP: You could use the same recipe for making a 7″ cake but I would fold in about 40g of melted butter before pouring into the cake tin – it makes the cake more moist.

Posted in Cake, Recipe | Tagged , | 3 Comments

How to roll a perfect roulade

The term ‘roulade’ comes from the French word ‘rouler’ which literally means ‘roll’. In patisserie, it is simply a sheet of cake rolled around jam, buttercream or other fillings. This really simple and easy cake has somehow gained a reputation as being ‘Not for Beginners!’.

With this post, I am hoping to bust this myth and help you avoid the common mistakes responsible for it.

Roulade with jam and buttercream

1. A flexible sponge
There are various recipes and techniques used to make the sponge for a roulade – French meringue, split egg, Genoise…. the list goes on. I tend to use the ‘Genoise‘ or egg foam method as this gives me a perfectly light textured flexible sponge.

2. Cooling it
To avoid cracking when you roll, you need to ensure your sponge doesn’t overcook, undercook or dry out too much. (I believe this was what caused all the roulade disasters in the ‘Great British Bake Off’ this week. Most of the contestants left their sponges to cool in their baking trays. The heat from the trays cooked them even further making them quite dry and prone to cracking.)
Remember to take the sponge out of the oven at the correct time and leave it to cool on the baking paper for 5 minutes. Then turn it over on a fresh baking sheet and peel off the one it was baked on. It should be cool enough to trim and roll in 10-15 minutes.

3. Rolling technique
I have seen people struggle to roll the roulade once they have spread their fillings. They fumble about with a baking sheet and declare that this is the realm of the professional chef! The truth is if your sponge is the correct texture, you will not need to use a baking sheet at all. All you need to do is this:

Scrape off the filling from the edges

And this:

Roll inwards, towards yourself

Roll all the way to the end near you till it rests on its seam.

All rolled up

Place the roulade in the fridge to set. This helps it retain its shape and stops the icing/whipped cream from squishing out when it is cut.

Garnish and enjoy with oodles of confidence and tea!

Posted in Cake, Design | Tagged | 8 Comments

French buttercream

Sugar paste icing on celebration cakes is not to everyone’s taste (makes the cake too sweet, look kiddish & gives a strong sugar rush!). One can always use simple buttercream icing for decoration but it can make your cake taste too buttery & heavy to digest.

The secret to my delicious cakes is French buttercream icing – which is not only light, but tastes heavenly as well.

This delicious concoction of eggs, sugar syrup and butter goes perfectly with cakes, gateaux and pastries. A word of warning – my internet research indicates that a lot of recipes floating around on the web can be confusing on ingredients and technique. Some of them are downright criminal !!

Okay, so I am sharing here what I have learnt and used extensively over the last 2 years and know that it would work well for you too. Correct mixing is extremely important and so I strongly recommend a kitchen aid or a similar mixer or an extra pair of hands even !

Here goes :

Ingredients:

180g caster sugar
75ml water

Yolk of 2 eggs
1 whole egg

250g softened butter
1-2 tsp of vanilla extract (as per your taste)

Method:
1. Whisk the eggs and egg yolks in the machine till they are pale in colour.

2. At the same time, heat the sugar and water to 118 deg Celcius, commonly known in the pastry world as a ‘Soft ball solution’.

Pro TIP: If you don’t have a thermometer to tell you the exact temperature, here’s how you can tell when this stage is reached. Take a bowl of iced water. Dip your fingers in it. Then with a quick action, pick up a tiny amount of the sugar solution & place your fingers back in the ice, holding on to the sugar. Remove from ice & roll the sugar with your fingers. It should resemble a soft and squishy ball of sugar. Doesn’t sound easy at first, but you should get the trick after 3-4 tries. (I’ll try and get a youtube video of this made soon)

3. As soon as you reach the soft ball stage, turn down the mixer speed (to avoid splashing the hot liquid around) & pour the sugar solution into the whisked eggs.

4. Turn the mixer speed up (I usually cover mine with a splash guard before I do that – I hate to clean up the mess afterwards) and whisk until the mixture cools down to room temperature i.e you can touch the bowl without feeling any heat.

5. Add chunks of softened butter, continue to whisk and watch them getting absorbed into the mixture.

6. Once you are done with all the butter, add any flavourings like vanilla extract, coffee extract, praline paste or melted chocolate (or a combination of them) and whisk until these get incorporated.

Layer and coat your cake with this buttercream or enjoy a liberal splash on your cupcakes.


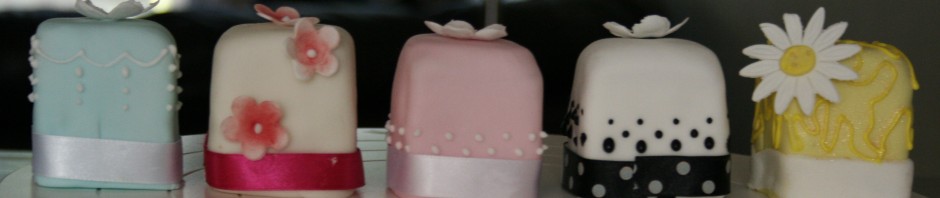
Cake with vanilla flavoured French buttercream


Cake with chocolate flavoured French buttercream

Posted in Cake, Recipe | Tagged , | 19 Comments

Chocolate modak

Back to my blog after a long break away in not-so-sunny Mumbai!

My last month has been a month of festivities and sweet treats. The Hindu festival of Ganesh Chaturthi started last week – it is celebrated over 10 days and is dedicated to Ganesha.

Here’s the recipe for a special sweet we made as an offering to Lord Ganesha.


Recipe: (makes approximately 25 modaks)

Ingredients:
1 cup khoya/mava
3/4 cup icing sugar
1/2 cup milk powder
2 tbsp cocoa powder

Method:

  • Saute the mava, cocoa powder & milk powder over low heat until mixed properly
  • Take off the heat
  • Stir in the icing sugar & leave to cool down to room temperature.

  • Place the mixture into metal modak moulds and press the 2 parts of the mould together. (NOTE: You can shape them with your fingers if you don’t have this mould)

  • Place each modak on its base and leave to set at room temperature.
  • Enjoy each one while you can – they won’t last very long! 🙂
Posted in Recipe | Tagged , , , | 2 Comments

Baking without a regular oven

I’m enjoying visiting my family in India but missing baking already!

Most Indian cooking is done on a hob and doesn’t require an oven. So it is a big challenge to find a half decent oven in households. My sister-in-law has managed to get hold of the best available option, commonly referred to here as an OTG (oven-toaster-grill).  It is a small box like appliance fitted with a baking tray & a removable grilling element. While a 12-piece cupcake tray can’t fit inside, it looks good for baking smaller cakes and tarts. I am going to try and bake a Victoria sponge in it today. Should be interesting to see how it turns out!

Now, off to the local supermarket to buy some ingredients!

UPDATE:
I went to the local supermarket here in Thane, India hoping to get some basic ingredients for my cake. Nothing fancy – just some plain flour, unsalted butter, eggs, caster sugar, icing and vanilla extract – things you can find very easily even in convenience stores in the UK. I could not believe how difficult it was to find the same things here! There was no unsalted butter available & no vanilla extract either! No free range eggs either 😦
The price of caster sugar and icing sugar was a higher than what I pay for in the UK when usually the cost of meals is far lesser here.
I went ahead and bought the salted butter with the least amount of salt on it and all the other local ingredients and went ahead with my cake.
The overall results were quite satisfactory – the cake was well risen and tasted soft and spongy. The salt in the butter altered the taste & colour (a bit yellow) slightly. The worst affected was the buttercream icing – I didn’t quite fancy the salty aftertaste.

Posted in Cake | Leave a comment

“Gift Wrapped” cake

My friend wanted to give her son’s nursery carers a parting gift but was stuck for ideas. So here’s a cake I made for her – all gift wrapped and ready to eat!

The cake itself is a chocolate sponge filled with chocolate buttercream icing. I have covered it with chocolate flavoured sugar paste icing and stuck some round cut outs in shades of pink and purple as this is a cake for girls.

Normal sugarpaste cannot hold its shape very well, so for the bow on top, I went for flowerpaste instead. I was able to get a neat little bow & give the cake a little bit of height too.

I made about 10-12 loops from flowerpaste strips and assembled them on a small disc one layer at a time. This is a technique I had used before with pulled sugar.

I am pleased to report that it worked in this case too!

Posted in Cake, Custom, Design, Fun | Tagged , | 1 Comment

Cake for a cause

Triathlon theme cake by DeepDelights
Triathlon theme cake, a photo by DeepDelights on Flickr.

This week is all about good causes. Some of my husband’s colleagues are running a triathlon this weekend to raise money for Alzheimer’s Society. To help them out with their fundraising, I was roped in to make them a cake to raffle at the office.

Keeping in theme with the triathlon event, I re-used a logo I found on the British Triathlon Federation website, which shows 3 faces wearing swimming, cycling and running gear.

The cake inside is a Victoria sponge with raspberry jam and vanilla buttercream.  I decorated it with cut outs of 3 faces and swimming, cycling and running headgear using Sugarpaste icing and inner details using black Royal Icing . These were placed in 3 different coloured sectors, each representing the typical terrain for that sport. It provides a nice contrast and context for it. I have used a blue ribbon to decorate the sides of the cake representing Alzheimer’s Society.

I hope it proves to be popular and raises enough funds for such a worthy cause.

UPDATE:
Since the blog post, the raffle has been completed and the collected over £30 for the team, a decent amount for a day’s work!

Posted in Cake, Custom, Design | Tagged , | Leave a comment

Guitar cake

My favourite nephew turned 16 today!
As he is a big guitar enthusiast, I couldn’t think of any other cake for him.

This cake was made from a rectangular block of chocolate cake and the shape was carved out.

From Guitar cake
From Guitar cake

The cake was then cut horizontally to fill with ganache, coated with buttercream and finally covered with sugar paste icing. The tuning keys were made of flowerpaste and coloured with silver dust. The strings and frets are piped royal icing.

Here’s the finished product:

From Guitar cake

Happy Birthday my dear Yash!

Posted in Cake, Custom, Design, Fun | Tagged | Leave a comment

Harry Potter cupcakes

Life of Harry Potter by DeepDelights
Life of Harry Potter, a photo by DeepDelights on Flickr.

This weekend was a particularly busy one with house guests and parties and of course, plenty of baking! Made a ‘Fraisier’, a strawberries and cream sponge cake, for friend who wanted something unique to take to his ex-boss’ place, a passion fruit mousse cake to take to another friend’s lunch party and something extra special for her little girls!

The last instalment of Harry Potter and the Deathly Hallows released last week to bring an end to a wonderful movie series. As a tribute to the books I have immensely enjoyed reading over the years, I decided to make cupcakes for the children with this theme in mind.

The highlight of the Deathly Hallows has been the 7 horcruxes:
1. Tom Riddle’s Diary
2. Slytherin’s locket
3. Marvolo Gaunt’s ring
4. Hufflepuff’s cup
5. Ravenclaw’s diadem
6. Nagini
7. Harry himself

I made all these as sugarpaste toppers for each cupcake.
To make it a dozen, I also made a few other Harry Potter related toppers like the Golden Snitch, Harry’s broomstick, wand, Gryffindor’s scarf and the sign of the Deathly Hallows.

Needless to say, my friend’s girls were really excited to see them and the 5 kids finished off a dozen cupcakes in no time!

Posted in Cupcake, Design, Fun | Tagged | 1 Comment

Mmm Macaroons!

From Cakes

Macaroons with Raspberry Jam

Made these using the Italian Meringue method as I find they are less fragile as compared to the ones made with the French Meringue one.

Ingredients:
70g icing sugar
70g ground almonds
100g caster sugar
35ml water
egg white from 2 eggs (should give about 60-65g)
food colour of your choice
Jam or buttercream icing

Method:
1. Sieve almonds & icing sugar together.
2. Whisk 50g egg white in a machine bowl.
3. Make a soft ball syrup with the caster sugar and water (i.e. cook to about 118 deg C)
4. Add the sugar syrup to the egg whites and whisk until the mixture cools down (it starts to look like toothpaste at this stage!). This mixture is commonly known as ‘Italian Meringue’.
5. Gently fold the almonds and icing sugar into the Italian Meringue.
6. Add food colour & mix in nicely.
7. Add about 1 tablespoon of the remaining egg white to make the mixture a little bit looser otherwise the macaroons will not have smooth tops.
8. Add this mixture to a piping bag with a small (6mm) nozzle attached.
9. Pipe 10p sized circles on a silicon mat (or parchment paper) placed on a baking sheet.
10. Leave outside for at least 30 mins to allow a crust to form over each macaroon.
11. Bake in the oven at 150 deg C for 5 minutes then turn it down to 120 deg C and bake for another 10 mins.
12. Leave on tray to cool down. Once cool sandwich 2 equal sized halves with jam or buttercream in the middle.

I made about 35 macaroons with these measurements (70 halves).

These are perfect for snacking at anytime…. can’t wait to have some with my tea 🙂

Posted in Recipe | Tagged | 2 Comments